How to send Discord notifications with Knock
In this guide you’ll learn how to use Knock to send notifications to Discord.
We’ll cover:
- Methods for sending notifications to Discord
- Incoming webhooks configuration
- Bot configuration
- Triggering the notification to your Discord channel
Methods for sending notifications to Discord
We support two main methods for sending notifications to Discord:
- Discord incoming webhooks
- Discord bots
Incoming webhooks are simpler in terms of configuration and will probably serve best for most cases but if that's not enough, using bots should provide enough flexibility for all use cases.
The main difference with both approaches is that for incoming webhooks, you need to create one per Discord channel. If you are planning to notify just a few Discord channels, this is probably the easiest, but if you need to notify multiple Discord channels the bot appproach will work best. Additionally, Message Components cannot be used with the incoming webhook approach, so if you're planning on leveraging those you should create a bot.
Next we'll walk through how to configure each of these methods to send Discord notifications using Knock.
Method 1: Incoming webhooks
Configuring Discord
To create an incoming webhook for a Discord channel, hover over the channel name and you'll see a gear icon appear. Click the gear and you'll be taken to the channel's edit screen, click on "Integrations".
Next, click on "Create Webhook", provide a name, image and a channel and copy the webhook url by clicking on "Copy Webhook URL". The channel you have just selected will be the one notified when a Knock workflow gets triggered. We'll use the URL you copied to set that data in Knock.
Here's an animation of where to find these details in Discord:
Configuring Knock
Set a new Object in Knock that will contain the Discord channel data (Object documentation here). For this example, let's call our object "My project" and give it an id of project-1. Its collection will be projects. Then we set that in Knock:
If we check the Objects tab in our Knock dashboard, we can see the project exists there. Now we can give it specific channel information so it knows where to post in Discord.
Take the URL you copied from the Discord webhook and set channel data on the Object we just set:
You can navigate back to your Objects dashboard and verify that project-1 has the appropiate data set.
Now you're ready to send notifications to Discord via incoming webhook! Jump to the Triggering the workflow section to do so.
Method 2: Bots
Configuring Discord
1. Create an app and bot
You'll need to set up a bot and app to handle incoming messages from Knock. You can learn more in the documentation for creating Discord apps and creating Discord bots (note: you'll need to be logged in to access the applications docs).
2. Set OAuth permissions for the bot
Once you have a bot created for your app in Discord, you can set permissions and authorize it to join your Discord server.
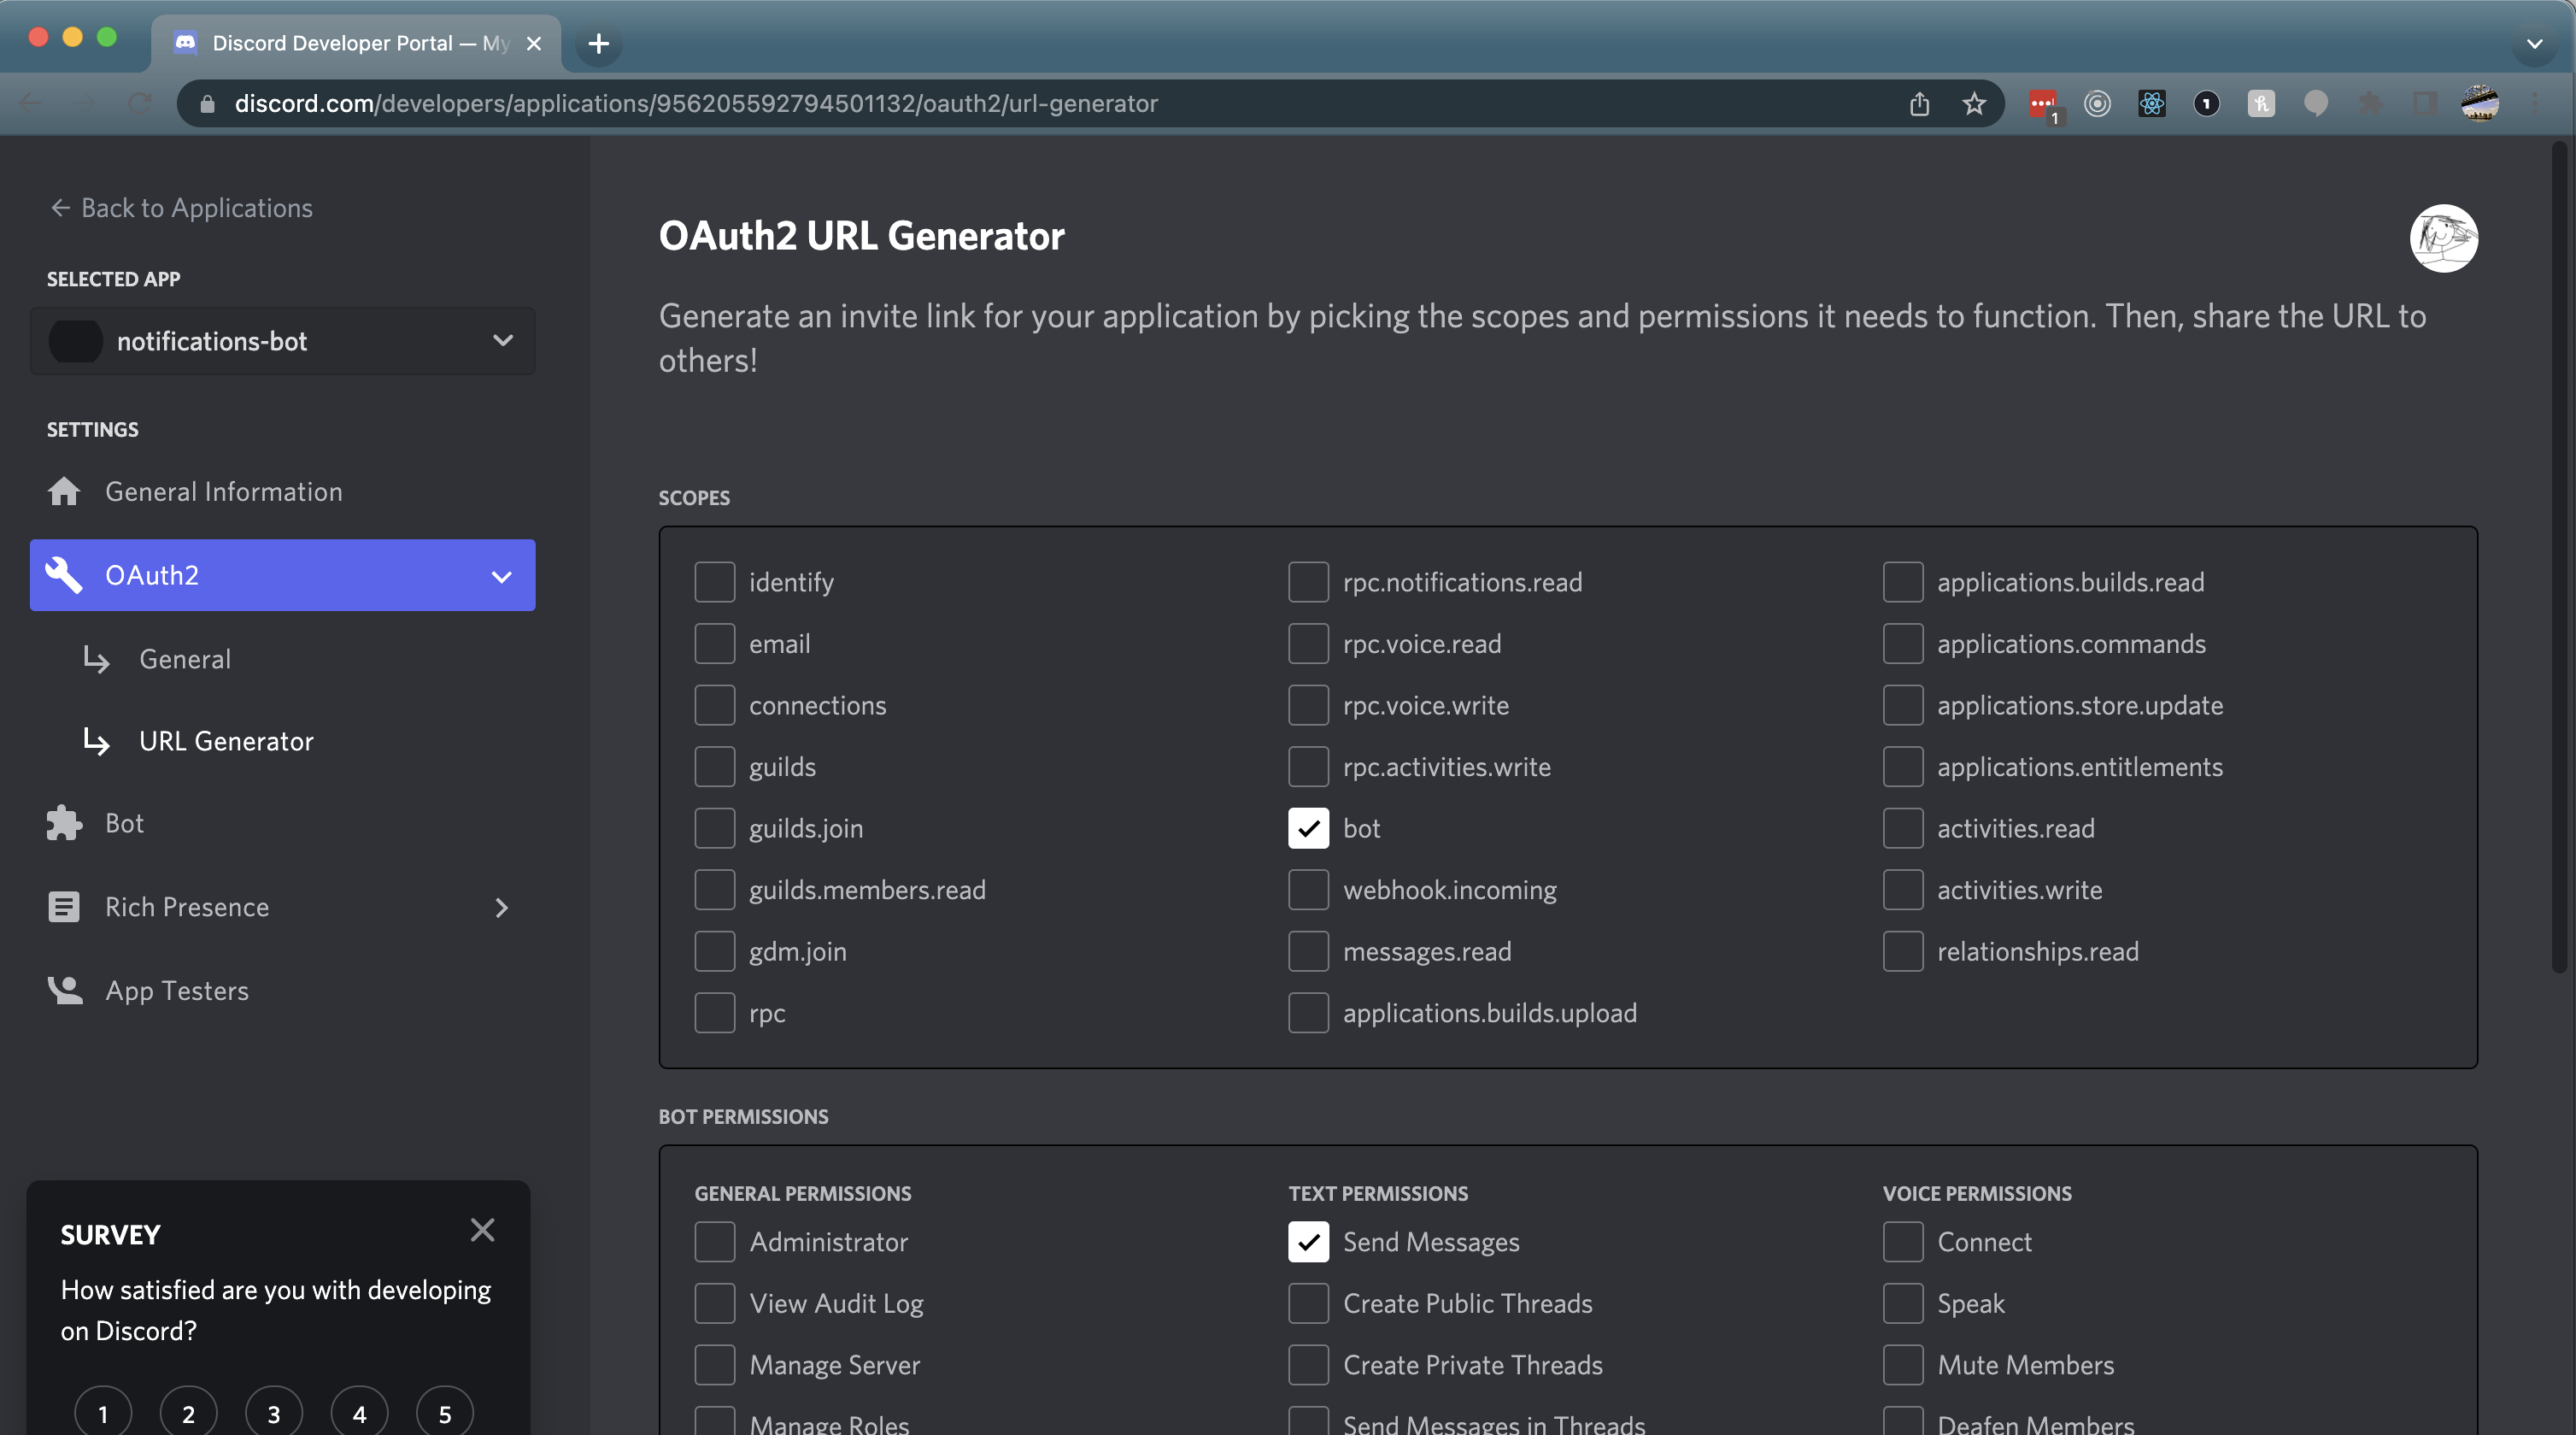
Within the Application you've created on Discord, find the URL Generator under OAuth2. You can accesss the URL generator using the URL below:
https://discord.com/developers/applications/<your application id>/oauth2/url-generator.
- A scope is a permission granted to a Discord app when it joins a Discord server.
- Bot permissions dictate what the bot can do in the server.
The URL Generator will build our bot invitation link for us. Under Scopes check "bot" and under Bot permissions check "Send Messages". If you have more advanced use cases, here's where you can set various permissions for your bot, but this is the minimum we need to give it the ability to pass along messages from Knock.
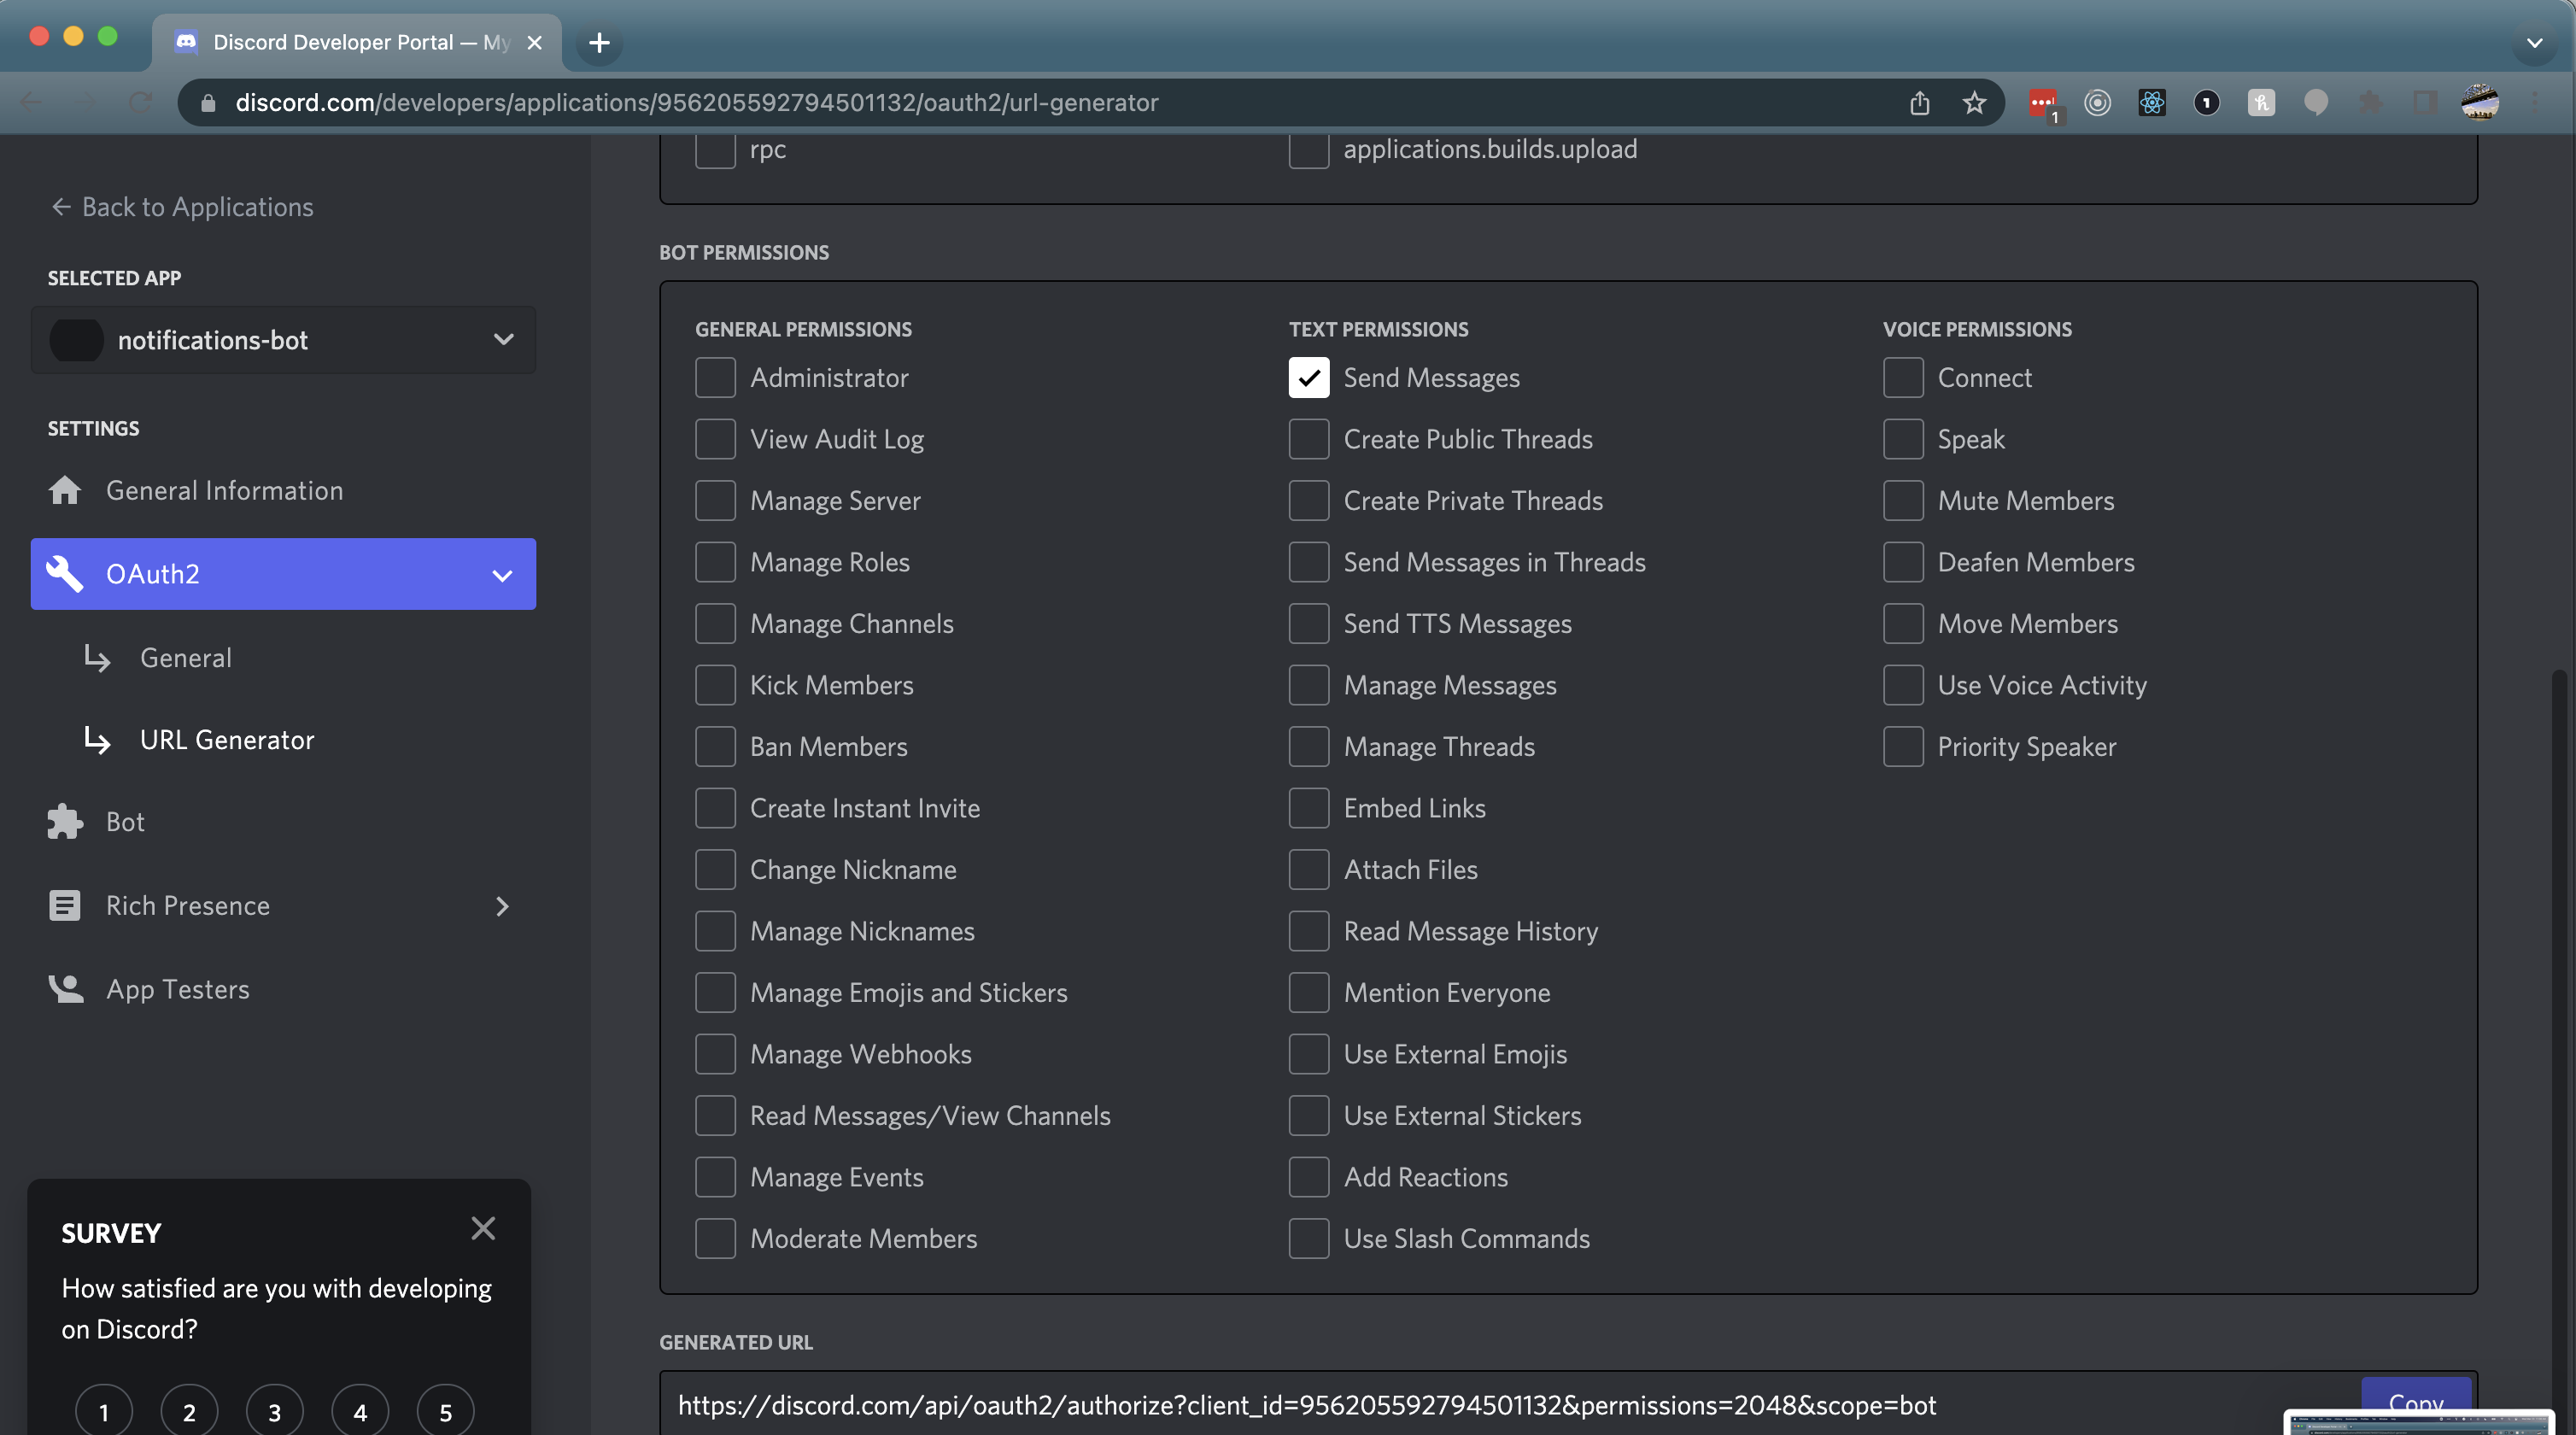
Scroll down and copy the generated URL, and paste it into your browser. You will see a prompt to allow it access to the Discord servers you are an administrator of. Select your desired server and proceed to authorize it.
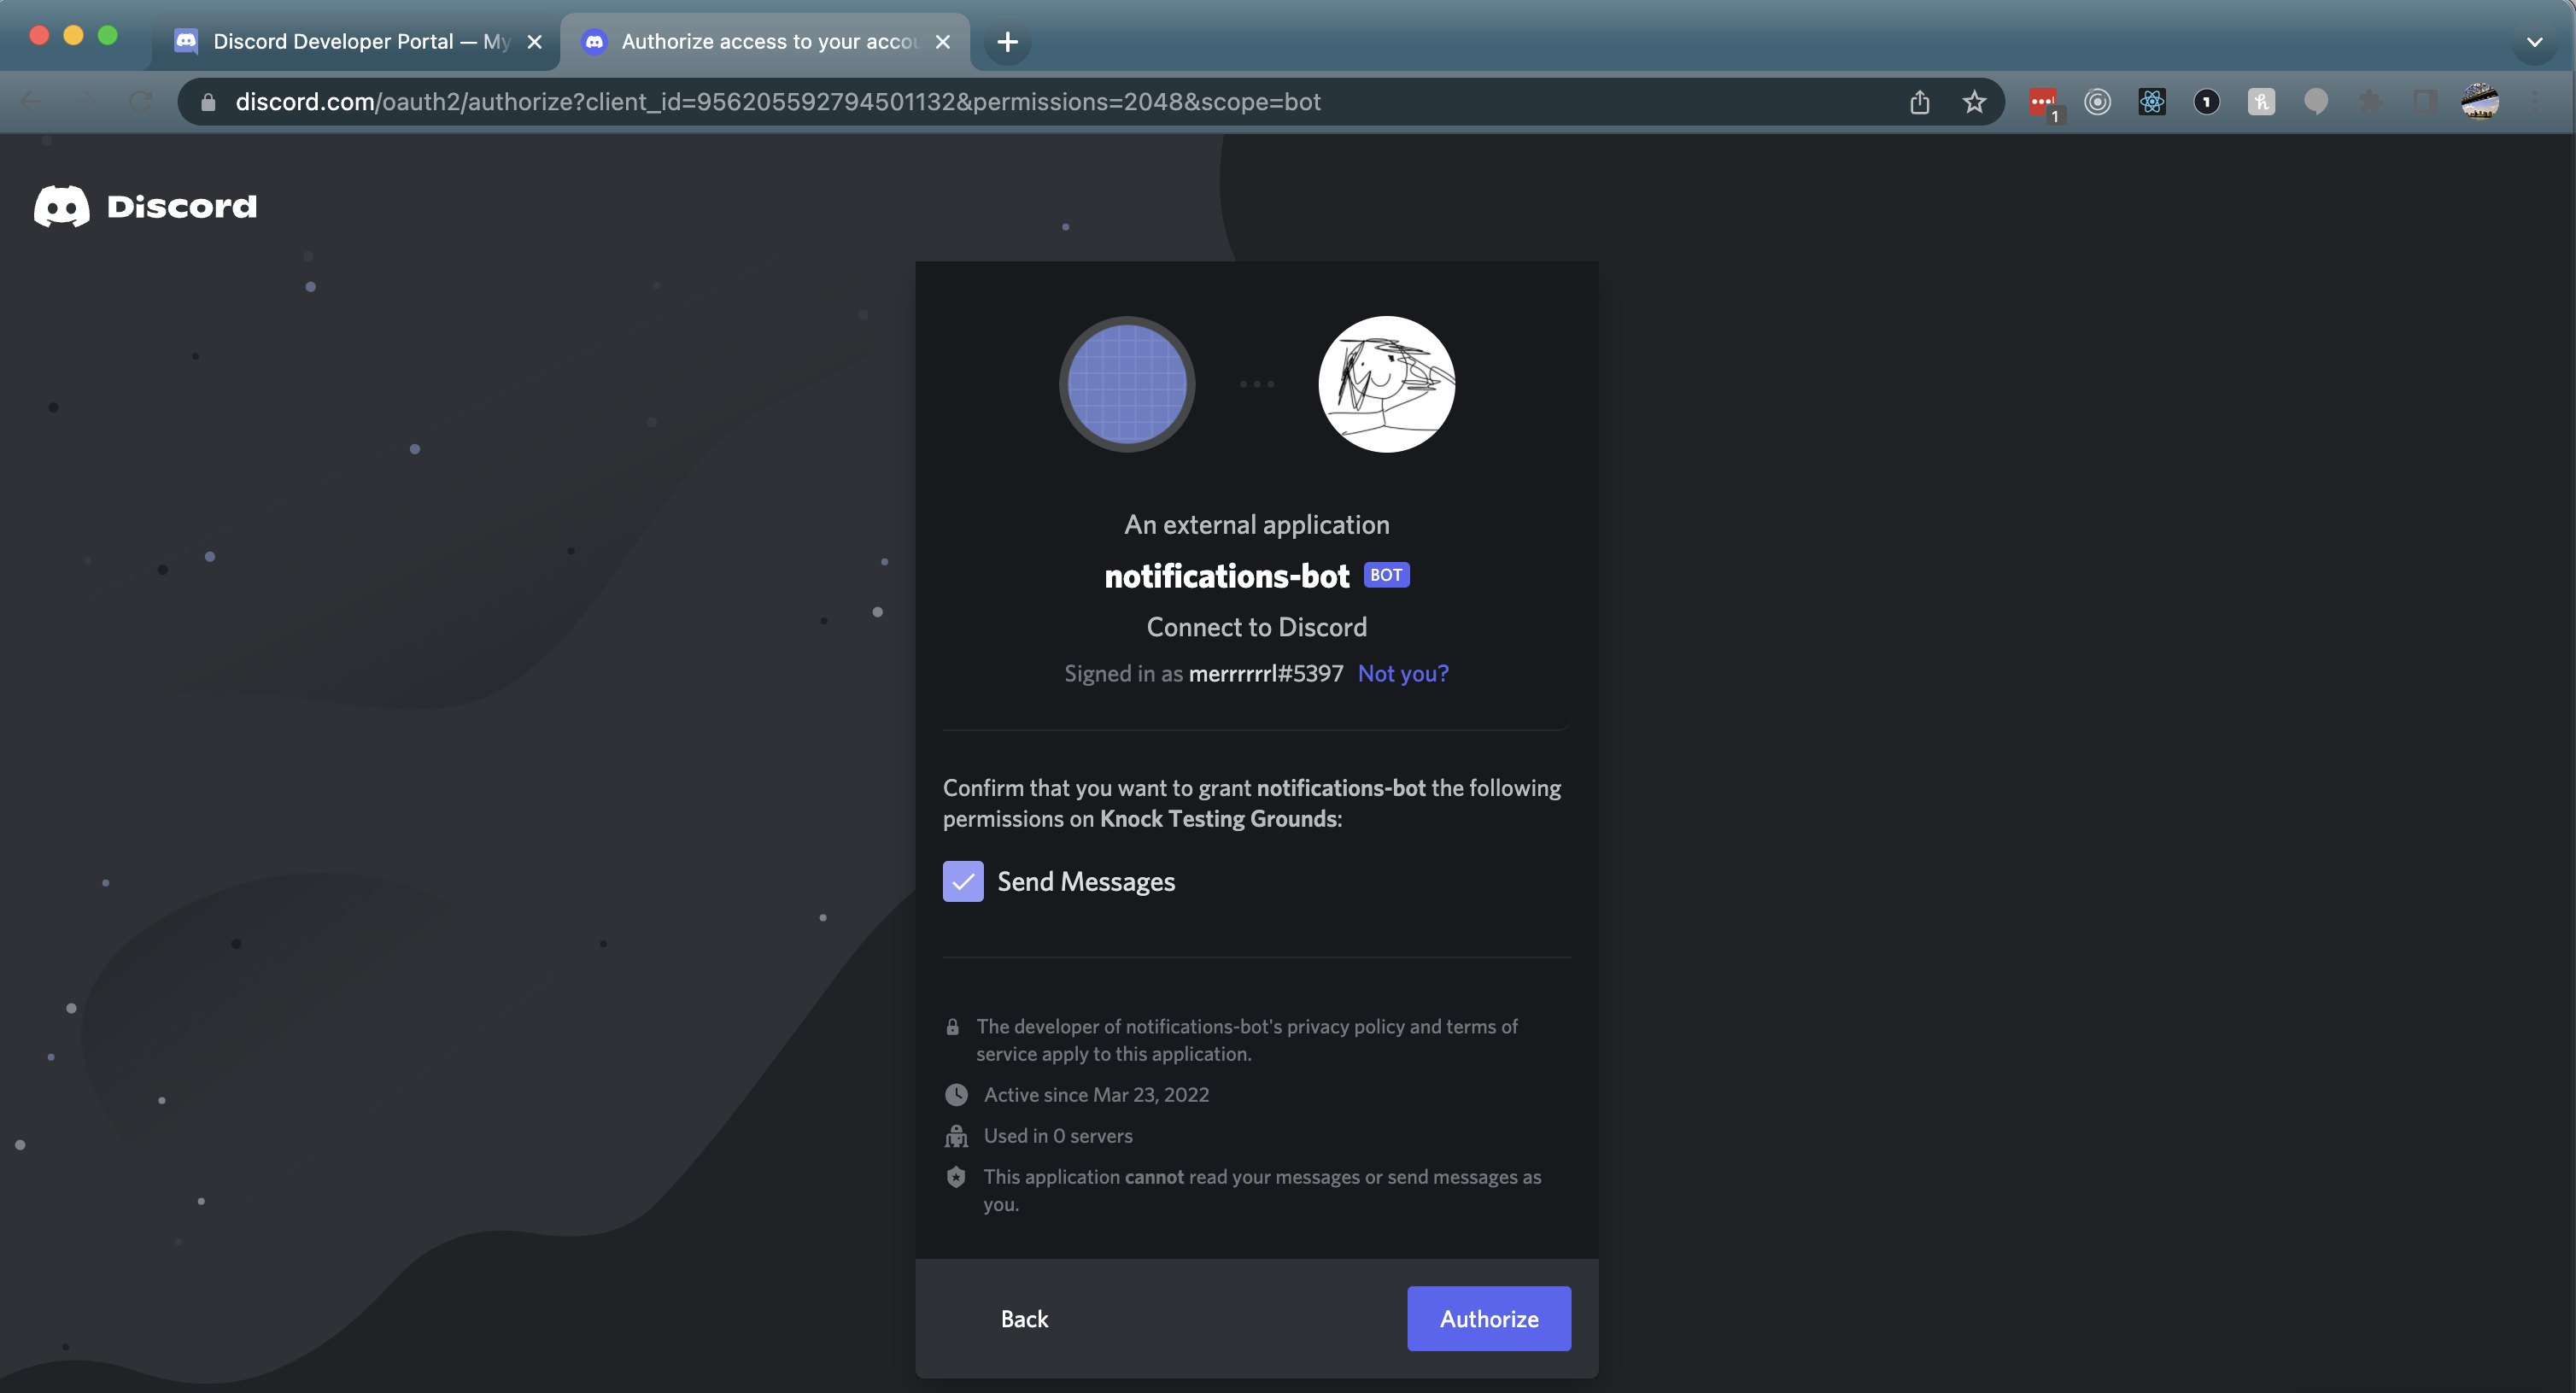 Now you should see your new bot enter your Discord server! We can move on to configuring your channel in Knock.
Configuring Knock
1. Add your Discord channel to Knock
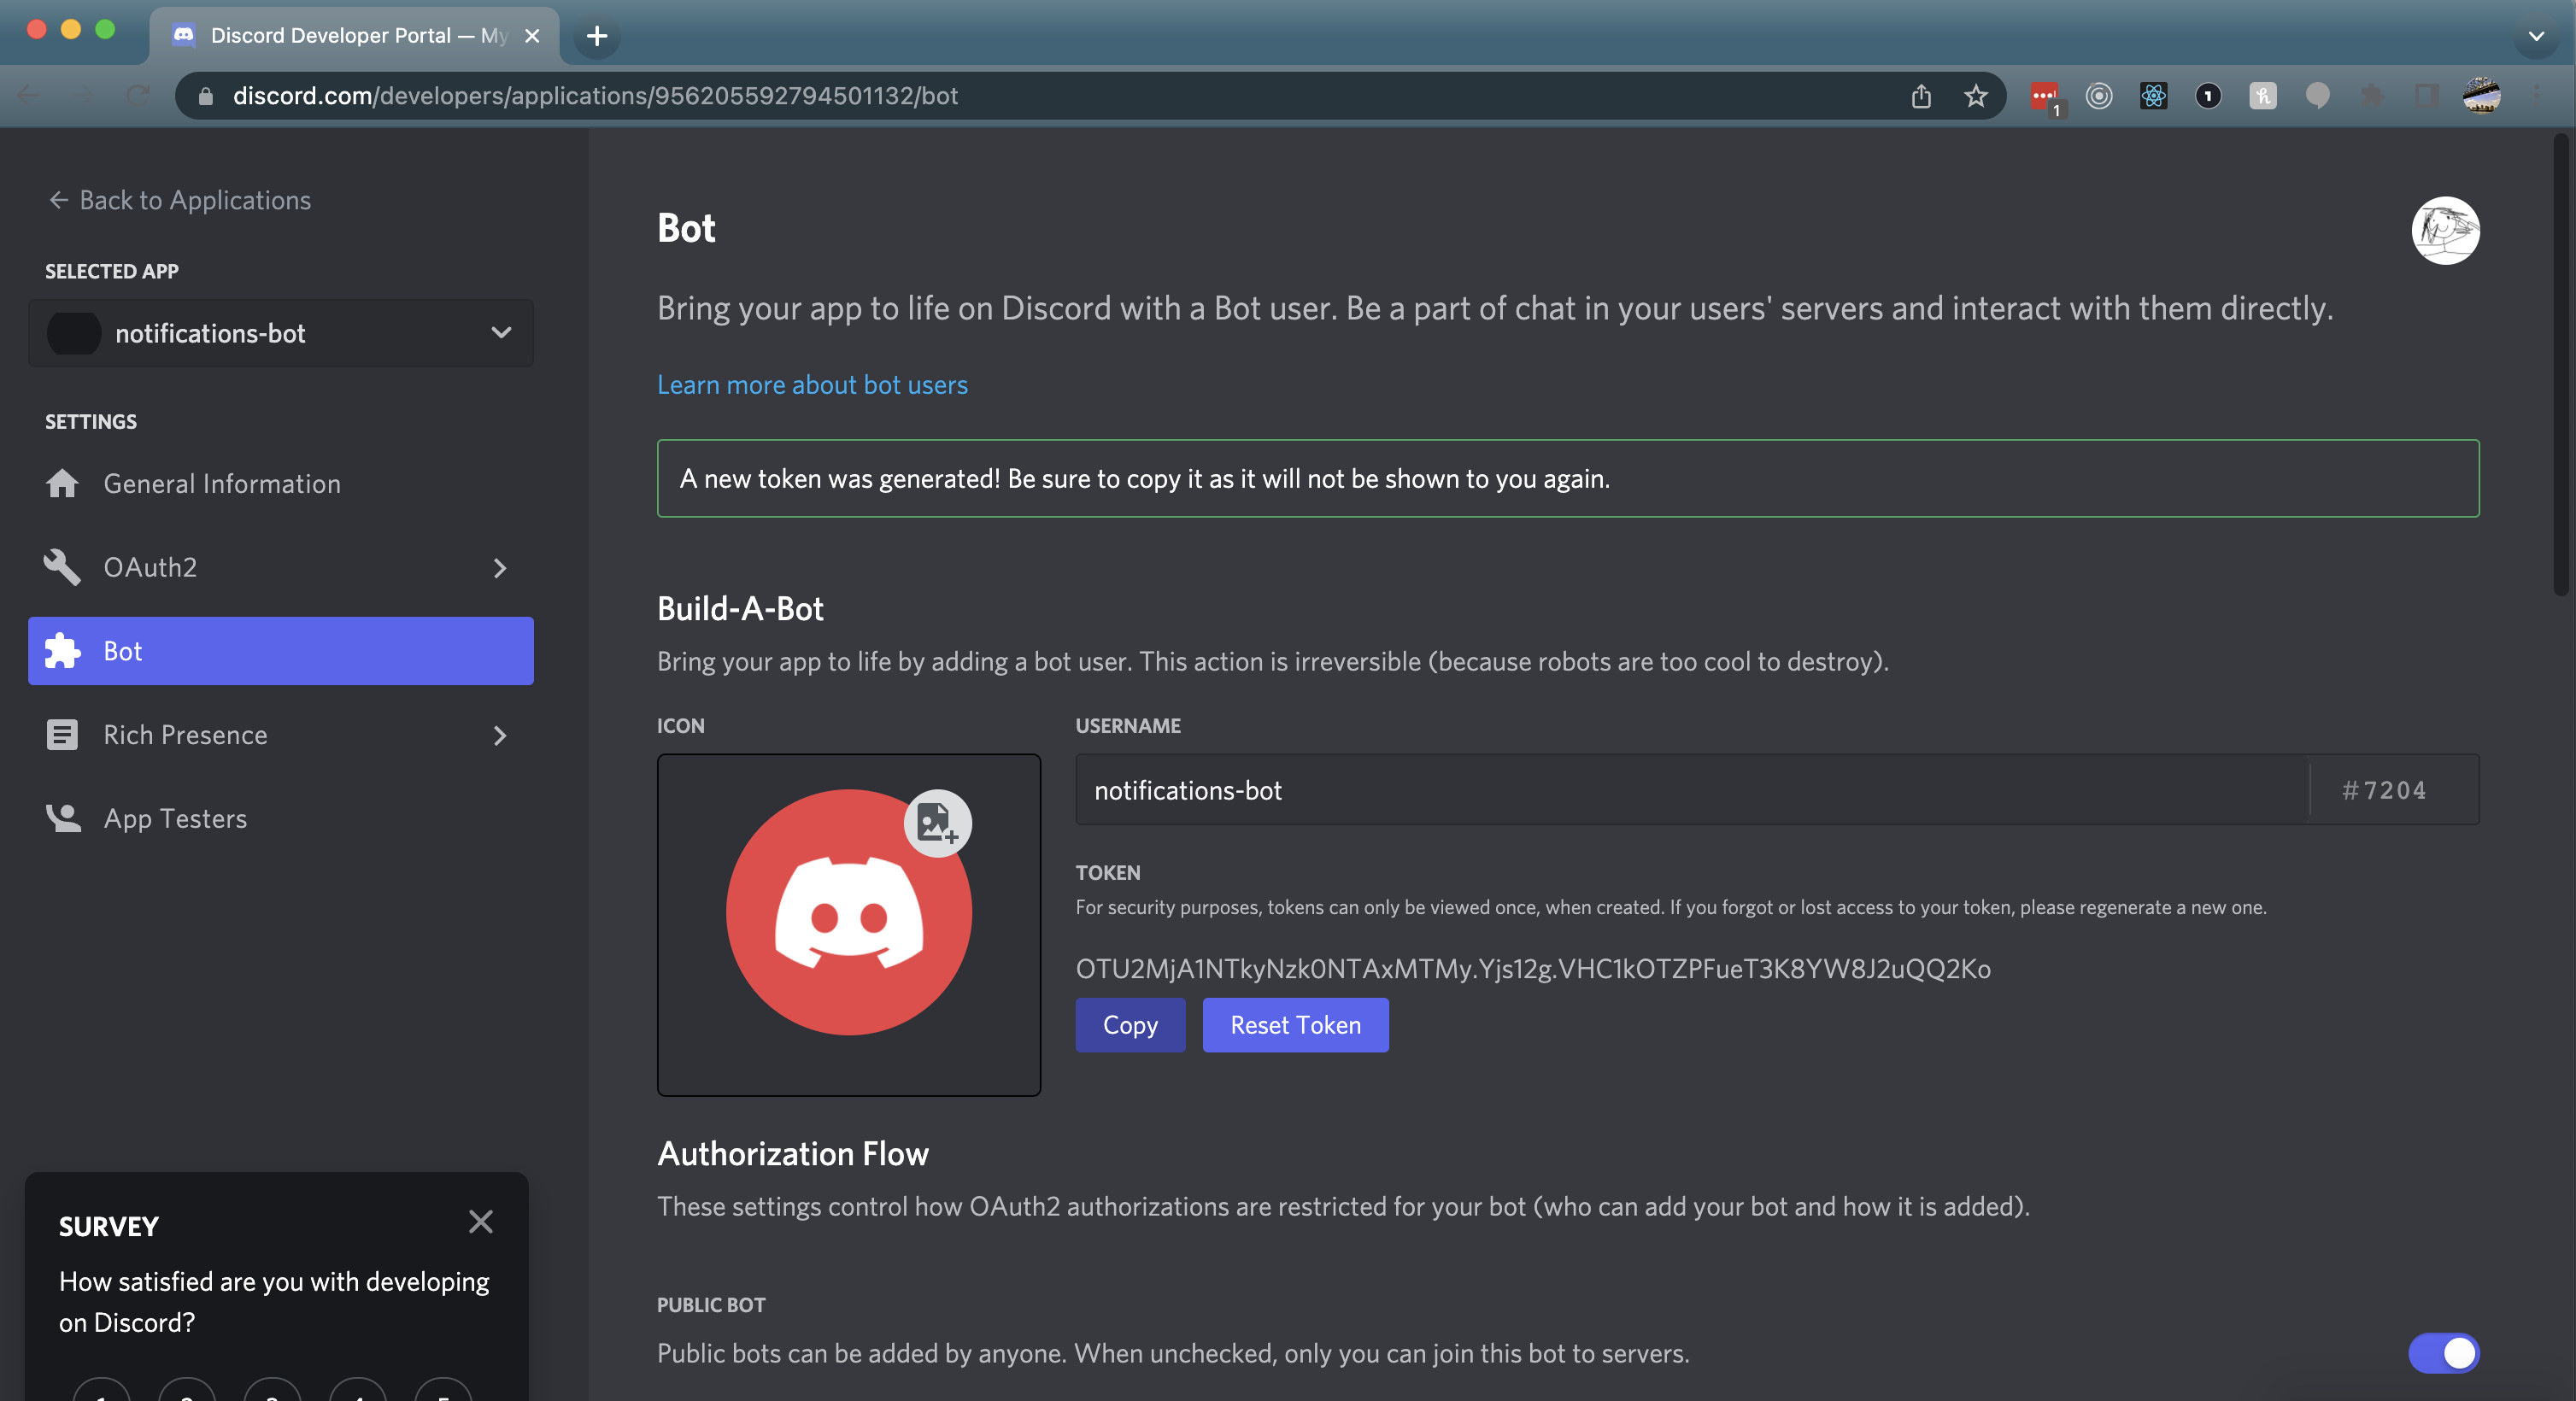
For this, you'll need your bot's token. In your Discord account in the browser, navigate back to your bot's settings: https://discord.com/developers/applications/<your application id>/bot
If you don't see a token, click "Reset token" and copy the result.
Now you can go to your Knock channels and create a new Chat channel, selecting Discord as the type.
Once it's created, click "Edit configuration" and paste in the Discord bot token you just created/copied above.
2. Set a Discord channel's data on a Knock Object
Set a new Object in Knock that will contain the Discord channel data (Object documentation here). For this example, let's call our object "My project" and give it an id of project-1. Its collection will be projects. Then we set that in Knock:
For Knock to know what Discord channel should post when "My project" is a recipient of a workflow trigger action, we need to set that information on "My project"'s channel data.
To do this we need the channel ID from Discord. Open Discord, navigate to Preferences in the main menu, and go to the Advanced tab under App Settings. From here you'll see a toggle for Developer Mode. Make sure that's turned on, then navigate back to your Discord server. Now if you right-click on a channel, you'll see "Copy ID" as an option in the list. Copy the ID for the channel you want to post to. For clarity, we'll call this the Discord channel ID.
We'll also need the ID for the Knock chat channel we set up in step 3. We'll refer to this as the Knock chat channel ID, which you can get in the channels tab of your Knock dashboard. Now we can set channel data for our project:
You can navigate back to your Objects dashboard and verify that Project 1 has the appropiate data set.
We've finished the Knock and Discord configurations and it's time to test triggering a workflow!
Triggering the workflow
We'll navigate back to our example app which will notify Discord users when a new comment is made. We just need to make sure we include our project as one of the recipients for this notification by including its ID and collection, like in the example below:
Depending on how you have configured your integration you should be seeing either your Discord bot or an incoming webhook ping the appropiate Discord channel.
Channel data requirements
In order to send a message to a recipient, you'll need to have the following channel data set for the recipient.